This is a basic tutorial for setting up and getting started with the Wifistepper board.
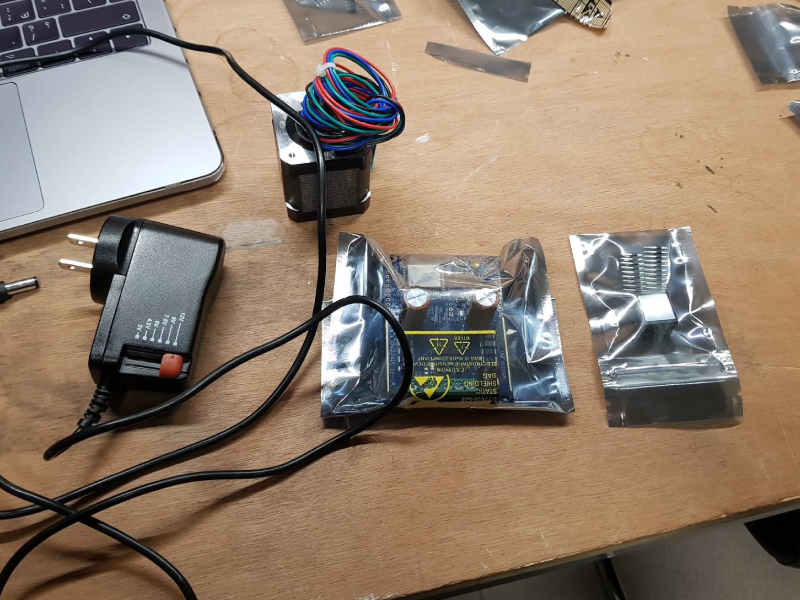
All the items that you will need:
- Wifistepper board
- Heat sink (included with the Wifistepper board)
- Stepper motor
- 12v-50v Power supply
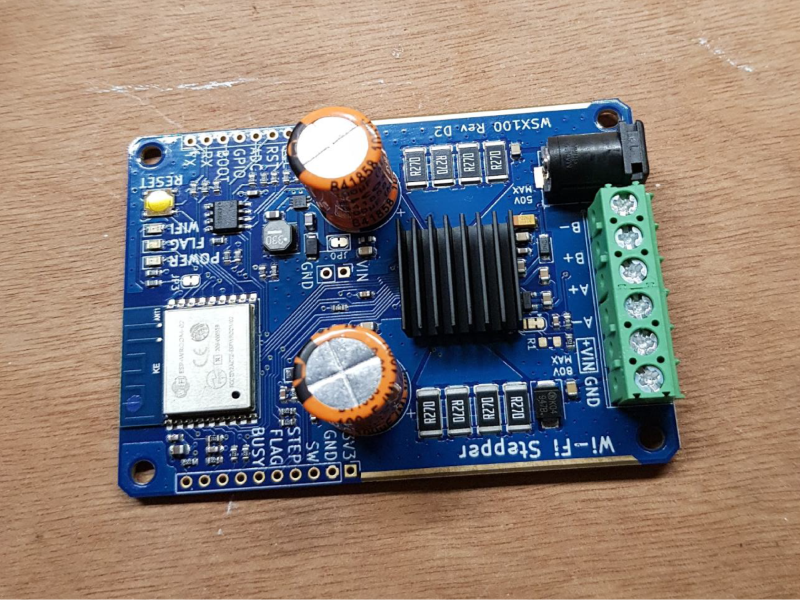
1) Remove the protective layer from the back of the heatsink, then place it onto the main chip on the board as shown in the picture:
2) Connect the wires from the stepper motor to the board using the screw terminals. If you’re using the same stepper motor as me, connect the red and blue wires together and the black and green wires together
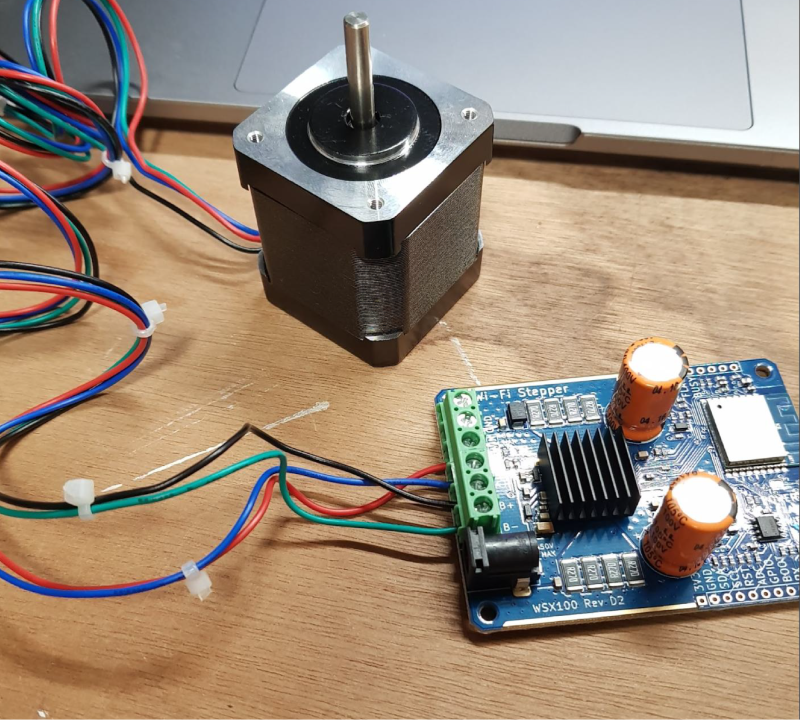
3) Connect it to the power supply

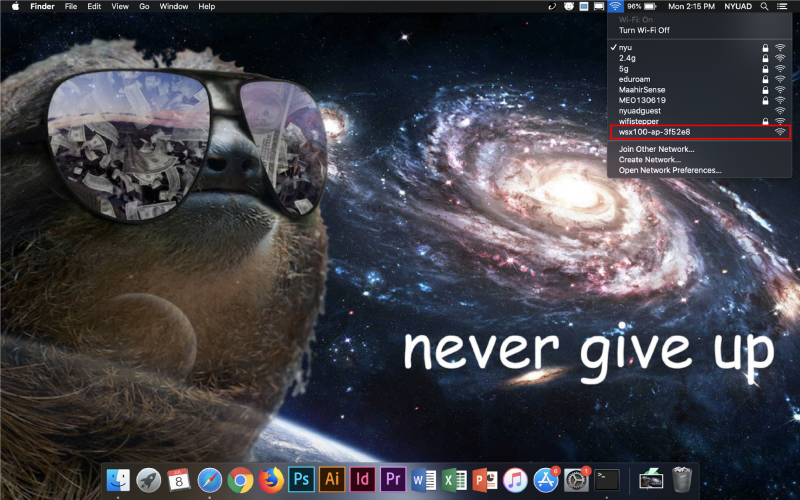
4) The wifistepper board will now be hosting its own server. Connect to that server, its address will be “wsx100-ap-*”. Then go to 192.168.4.1/quickstart on your browser.
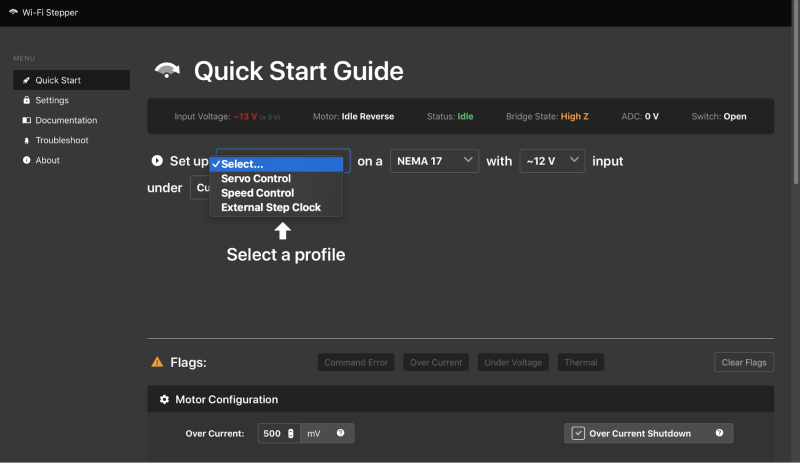
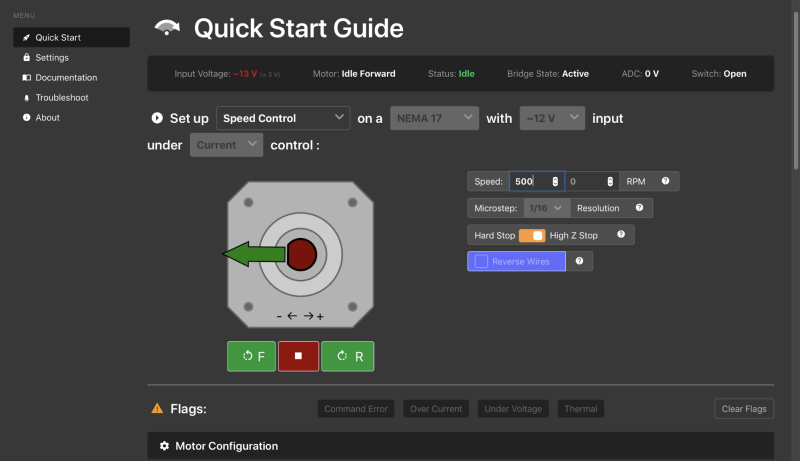
5) Select servo or speed control, depending on what you want to use.
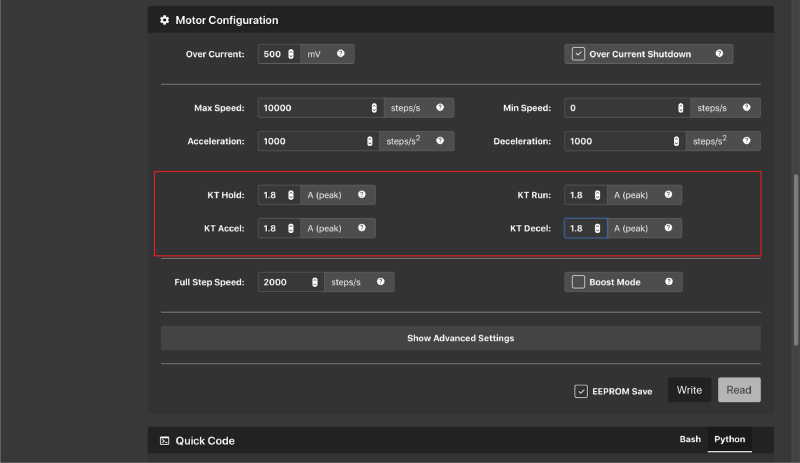
6) Make sure to adjust your KT values, I found 1.8 to be stable for my stepper motor.
7) Adjust your RPM depending on your voltage. I found for my stepper motor, a 12V supply could power the motor for up to 500 RPM, while the 24V supply powered the stepper motor to its maximum RPM which is 3000 RPM. Then hit the forward or backward button.
If you’re having trouble, make sure to check out the troubleshooting section on the board server, or check out the website